Exploring Steel Defiance’s Texture-based Armor system in Godot.
by Vicente C.
Published |
326
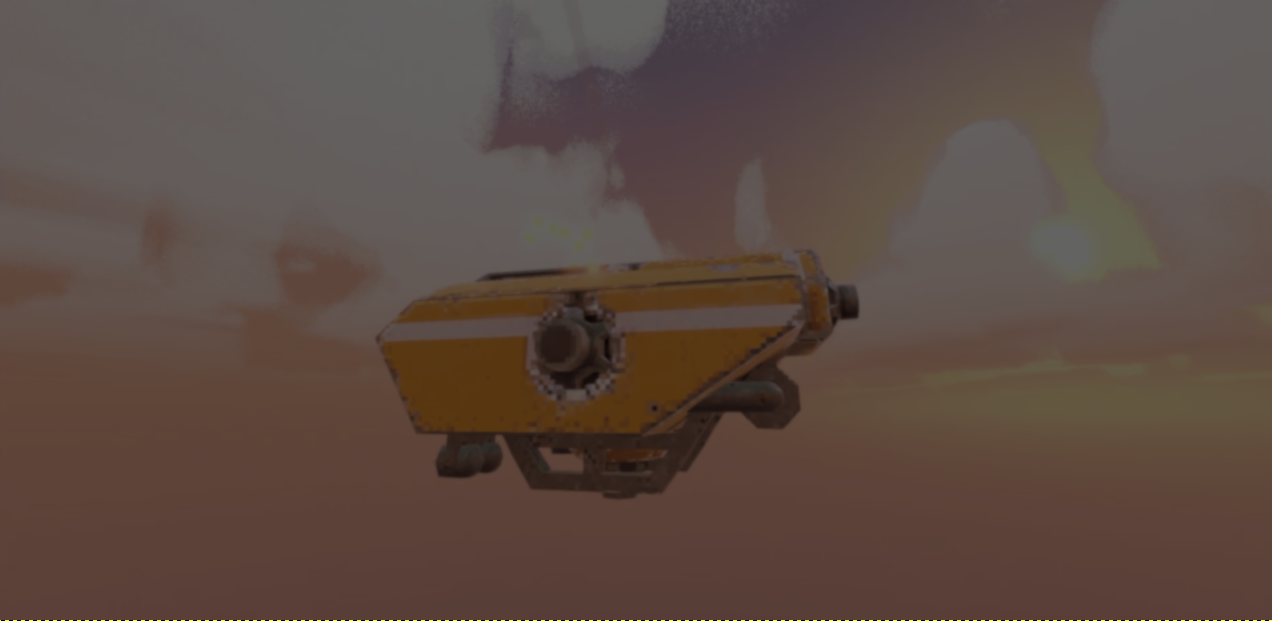
The developers behind Steel Defiance recently showed the texture-based armor system they have been building for their upcoming multiplayer mech game in Godot.
Instead of using decals or visual bullet holes, this system modifies the texture data across different texture maps, including a custom armor texture.
One of the trickiest parts of the system was mapping a 3D collision point onto the correct position on a 2D texture. By enabling Enable Ray Cast Face Index inside Godot Jolt, the raycast can return the exact triangle face hit by the bullet.
Using Godot’s MeshDataTool, the system can then access the vertex positions and UV coordinates for that specific triangle. After converting the hit position into local space, the developers used barycentric interpolation to find the exact position on the texture.
# Example code by the developers for the 3D -> 2D mapping:

# Mesh Data Tool
var mdt := MeshDataTool.new()

# Vertex indices for the face
var i0: int = mdt.get_face_vertex(face_index, 0)
var i1: int = mdt.get_face_vertex(face_index, 1)
var i2: int = mdt.get_face_vertex(face_index, 2)

# Local vertex positions
var v0: Vector3 = mdt.get_vertex(i0)
var v1: Vector3 = mdt.get_vertex(i1)
var v2: Vector3 = mdt.get_vertex(i2)

# UV coordinates
var uv0: Vector2 = mdt.get_vertex_uv(i0)
var uv1: Vector2 = mdt.get_vertex_uv(i1)
var uv2: Vector2 = mdt.get_vertex_uv(i2)

# Transform global hit to local space and calculate Barycentric coordinates
var local_hit: Vector3 = mesh_instance.to_local(hit_position)
var bary: Vector3 = Geometry3D.get_triangle_barycentric_coords(local_hit, v0, v1, v2)

# Interpolate UV to find the exact pixel position
var uv: Vector2 = uv0 * bary.x + uv1 * bary.y + uv2 * bary.z
var image_size: Vector2 = Vector2(image.get_size())
var pixel_pos: Vector2 = uv * image_size

# Get the color from the pixel
var pixel: Color = armor_image.get_pixelv(Vector2i(pixel_pos))
Once the texture position is found, the game draws circles onto different texture layers around the impact point. The size and depth of the damage change depending on the shell type and the amount of force behind the shot.
The paint gets stripped away and the armor weakens around the hit area. If enough damage builds up in the same spot, the projectile penetrates the armor completely.
The paint gets stripped away and the armor weakens around the hit area. If enough damage builds up in the same spot, the projectile penetrates the armor completely.
Performance was also one of the main concerns during development because the system constantly updates multiple textures while bullets impact the mech. According to the developers, stress tests with around 100 bullets per second kept the bullet hole and armor calculations around 0.52ms.
It is also fairly easy to synchronize in multiplayer. Each bullet hit stores information like penetration, diameter, position, and face index inside an array, allowing the same calculations to later run on other player clients.
If you want to follow the development of Steel Defiance, the links will be right below.
- Instagram: https://www.instagram.com/steeldefiance/
- YouTube: https://www.youtube.com/@SteelDefiance
Interested in more?
If you want to learn more about shaders in Godot, The Godot Shaders Bible covers topics like stylized shading, screen-space VFX, lighting, and vertex manipulation through step-by-step examples.
It is a good starting point for developers who want to better understand how shaders work and improve the visuals of their games. Not sure about it yet? Try the free sample.
It is a good starting point for developers who want to better understand how shaders work and improve the visuals of their games. Not sure about it yet? Try the free sample.
You could pay a lot for a Godot shaders course, or get the Godot Shaders Bible for just $29.99 ✨
— Shaders Bible Series (@ushadersbible) May 5, 2026
Looking to improve your game's graphics? This book might be exactly what you need ➡️ https://t.co/1kYkAqSE2L#godot #indiedevart #gamedev pic.twitter.com/aOjMGKP2f7
Jettelly wishes you success in your professional career!
Did you find an error? No worries!
Write to us at [email protected], and we'll fix it!
Level up your Technical art skills in Godot!
We invite you to explore "The Godot Shaders Bible", a comprehensive book on the concepts and fundamentals seen in this post.
Other posts that might interest you.
-
 Gameplay programmer Agustin Rosso open-sourced RossoForge, a modular Unity ecosystem with reusable packages for game flow, UI, pooling, events, and other common Unity systems.
 -
 Hoj Dee shared a tutorial showing how Cell Bombing can reduce visible texture repetition in Unreal Engine materials.
 -
 See how Mad Yeti Games did the procedural dungeon generation and timeline-based combat systems behind its upcoming action RPG.
